|

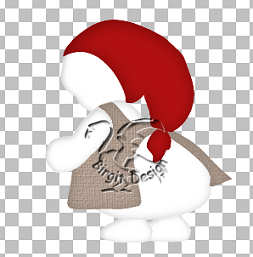
Here you have my snowman-mamma.
It's
done with Psp 7. The selections are here Open the zip-fil and open it in a
folder in your psp. You also have the dresspattern here.
Rightclick on it and save to your folder.
Remember to save often.
Now we go to start with an Image 400
x 400 transparent.
1.
New layer, call it head. Foreground
color to white.
Go to Selections / Load from disk and
find the folder where you open the sel file. Open head
file.
Fill with color.
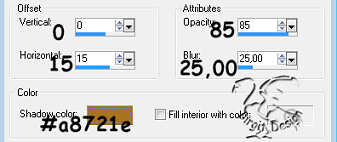
Go to Selections / Float. Now to
Effects / 3D effects / CutOut with these settings:
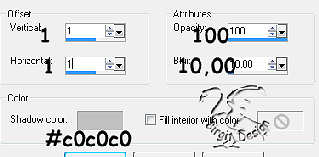
Deselect.
2.
New layer, body. Open body file.
Color, Float and Cutout as head, but sett blur to 15.
Deselect.
3.
New layer, dress. Open dresspattern
and sett foreground to pattern

Open
dress file and fill with pattern.
Float and Cutout as befor, but set blur to 20 and color 897b71.
Deselect.
4.
New layer, caps. Foreground #b01010.
Open caps file and fill. Float and Cutout as eks.:
Deselect.
5.
New layer, tassel.Open tassel file.
Color, Float and Cutout as caps, but vertical and
horizontal 0, opacity 100, blur 15.
Deselect.
6.
New layer arm. Foreground white.
Open arm file and fill. Float and Cutout:
.
Deselect
7.
New layer, foot. Move the layer
behind body layer.
Foreground white. Open foot file and
fill.
Float and Cutout as arm.
Deselect.
Right click on
the layer and choose duplicate. Use the mover  to place it. to place it.
Now we are here
8.
New layer, eyes. Foreground black.
Open eyes file and fill.
Deselect.
On same layer
Foreground white.
Use Airbrush size 4, round and place a dott in each eye.
9.
New layer, nose. Foreground E28344.
Open nose file and fill.
Float and Cutout as befor, but
color #c46322.
Deselect.
10.
New layer, cheek. Use Airbrush size
20 and make a dott.
Go to Effects / Blur / Gaussian blur
set to 4
11..
New layer , mouth. Foreground black.
Open mouth file and fill.
Deselect.
12.
Stand on tassel layer. New layer,
candle1.
Foreground #c00000. Open candle1 file and fill.
Float and Cutout as befor but color #800000.
Deselect.
13.
Stand on arm layer.New layer, candle2.
Foreground #bf0000. Open candle2 file and fill.
Float and Cutout as
candle1.
Deselect.
14.
Stand on tassel layer. New layer,
flame1.
Foreground #e28344. Open flame1 file and fill.
Float
and Cutout with these settings: Vert. 0 hori. 2, opac. 85,
blur 5 and color #800000.
Deselect.
15.
New layer, flame 2. Foreground #e7B899.
Open flame2 file and fill.
Deselect.
16.
New layer, wick. Foreground black.
Open wick file and fill.
Deselect.
17.
New layer, light. Send layer to
bottom.
Foreground #e9bd77. Open light file and fill.
Float and cutout with these settings.:
Deselect.
Go to layerpalett and lower the opacity to 84

18.
Stand on dress layer. New layer,
patch1
. Foreground #457fa7. Open patch1 file and fill.
Float and cutout as head but set blur to 15 and color #335d7b.
Deselect.
19.
New layer, patch2. Foreground #2b652b.
Open patch2 file and fill.
Float and Cutout as patch1 but
color #004000.
Deselect.
20.
New layer, patch3. Foreground #808080.
Open patch3 file and fill.
Float and Cutout as befor but
color #404040.
Deselect.
21.
New layer, patch4. foreground #2f3057.
Open patch4 file and fill.
On same layer use Paint brush
size 6, round and color white.
Do some dotts.
Float and Cutout as befor but set blur to 5 and color #000040.
Deselect.
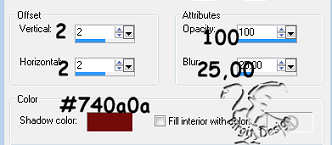
Now we have to make some stitch on
the patchs.
You have to stand on each layer.
We use Pen Tool size 2, freehand and Forground #404040. Background closed.
We also make some lines on the nose. On the caps and
tassel we use color #740a0a.
Now we are ready, so you can merge
visible all layers and may be save as a tube or psp Image.
Hope you enjoyed this tutorial.
If you have problems just mail me.
This tutorial made by me 30 0ctober
2003
and straighten it for Psp 9 Februar 2014
Tutorialer
|